Ember.js 是一个开源 JavaScript 框架,用于开发基于 Model-View-Controller (MVC) 架构的大型客户端 Web 应用程序。 Ember.js是使用最广泛的前端应用框架之一。它的目的是加速开发并提高生产力。目前,许多网站都在使用它,包括 Square、Discourse、Groupon、Linked In、Live Nation、Twitch 和 Chipotle。
组件类的 classNameBindings 属性用于将属性列表应用为类名。如果属性是字符串值,则该字符串的值将用作类名称。
用法:
classNameBindings: properties ;
参数:
- properties: 它是作为类名分配给 DOM 中的组件元素的属性列表。
安装和运行 ember 的步骤:
第 1 步:要运行以下示例,您需要有一个 ember 项目。要创建一个,您需要先安装ember-cli。在终端中写入以下代码。
npm install ember-cli
第 2 步:现在您可以通过输入以下代码来创建项目:
ember new <project-name> --lang en
要启动服务器,请键入:
ember serve
示例 1:键入以下代码以生成本示例的路由:
ember generate route file1
应用程序/组件/first.js
Javascript
import Component from '@glimmer/component';
import Ember from 'ember';
import { tracked } from '@glimmer/tracking';

export default Ember.Component.extend({

    tagName: 'section',
    classNameBindings: ['Name'],
    Name: 'component',

    @tracked
    name: 'Satyam Thakur',
    @tracked
    gender: 'M',
    @tracked
    occupation: 'Lawyer',
    @tracked
    salary: 87000,
    @tracked
    mobile: 8374847388,
    @tracked
    email: 'satyamthakur@gmail.com'


})
应用程序/组件/first.hbs
HTML
{{page-title "Component attributeBindings"}}
{{yield}}
<div>
    <label>Name:</label>
    {{this.name}}
</div>
<div>
    <label>Gender:</label>
    {{this.gender}}
</div>
<div>
    <label>Occupation:</label>
    {{this.occupation}}
</div>
<div>
    <label>Salary:</label>
    {{this.salary}}
</div>
<div>
    <label>Mobile:</label>
    {{this.mobile}}
</div>
<div>
    <label>Email:</label>
    {{this.email}}
</div>

{{outlet}}
应用程序/模板/file1.hsb
HTML
<First>
    <h1>
    GEEK's Details:
    </h1>
</First>
app.css
CSS
h1{
    font-family:  Tahoma, Geneva, Verdana, sans-serif;
    font-size: 25pt;
    color:#2fd778
}

.component{
    font-family: papyrus;
    font-size: 15pt;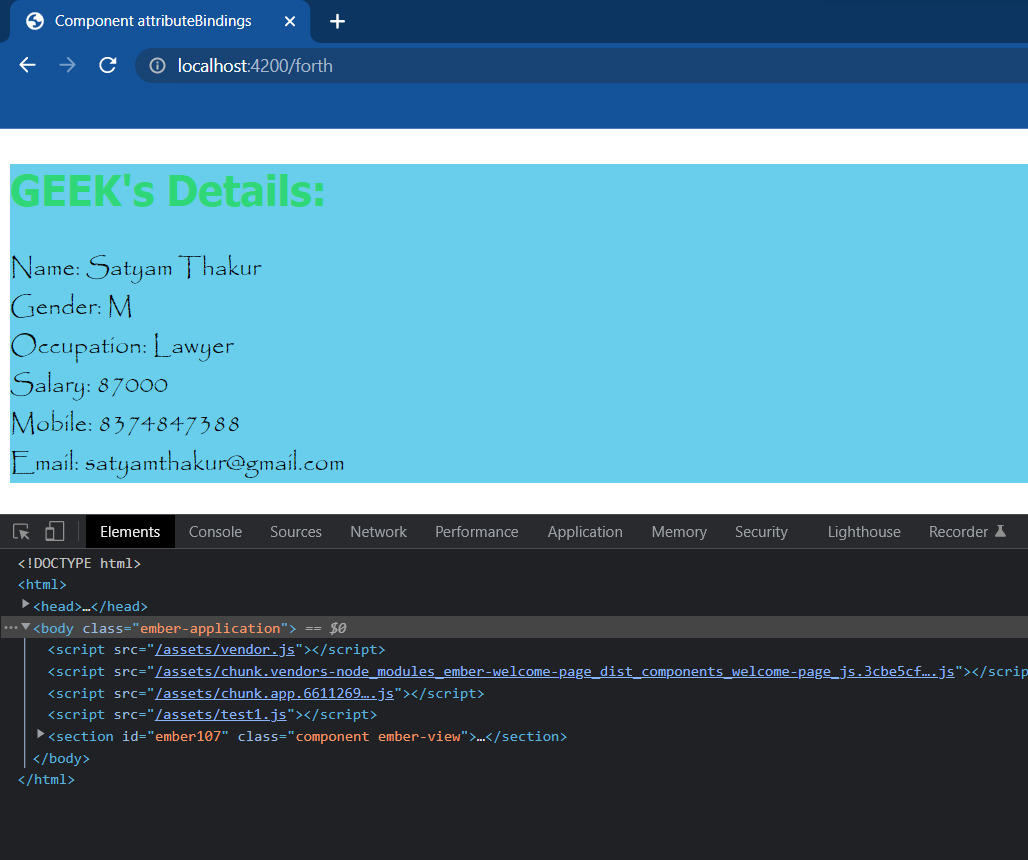
}输出:这里我们将类名“component”定义为DOM中的组件元素,并为该类名设置一些CSS属性。
示例 2:键入以下代码以生成本示例的路由:
ember generate route file2
应用程序/组件/second2.js
Javascript
import Component from '@glimmer/component';
import Ember from 'ember';

export default Ember.Component.extend({
    tagName: 'div',
    classNameBindings: ['temp'],
    temp: 'tutorial',

})
应用程序/组件/second2.hbs
HTML
{{page-title "Component attributeBindings"}}

<h3>{{yield}}</h3>
应用程序/模板/file2.hbs
HTML
<h1>GeeksForGeeks</h1>
<Second >
    Person:
    {{input value='Satyam'}}
    {{input value='Software Engineer'}}
</Second>

<Second @classNames="component" >
    Person:
    {{input value='Lisa'}}
    {{input value='Lawyer'}}
</Second>

<Second >
    Person:
    {{input value='Somaya'}}
    {{input value='Doctor'}}
</Second>
app.css
CSS
h1{
    font-family:  Tahoma, Geneva, Verdana, sans-serif;
    font-size: 25pt;
    color:#2fd778
}

.tutorial{
    font-family: papyrus;
    font-size: 15pt;
    background-color: #044a5f
}
.component{
    font-family: papyrus;
    font-size: 15pt;
    background-color: #68ceec;
}输出:在这里我们将看到内联类名称具有更高的优先级或 classNameBindings。
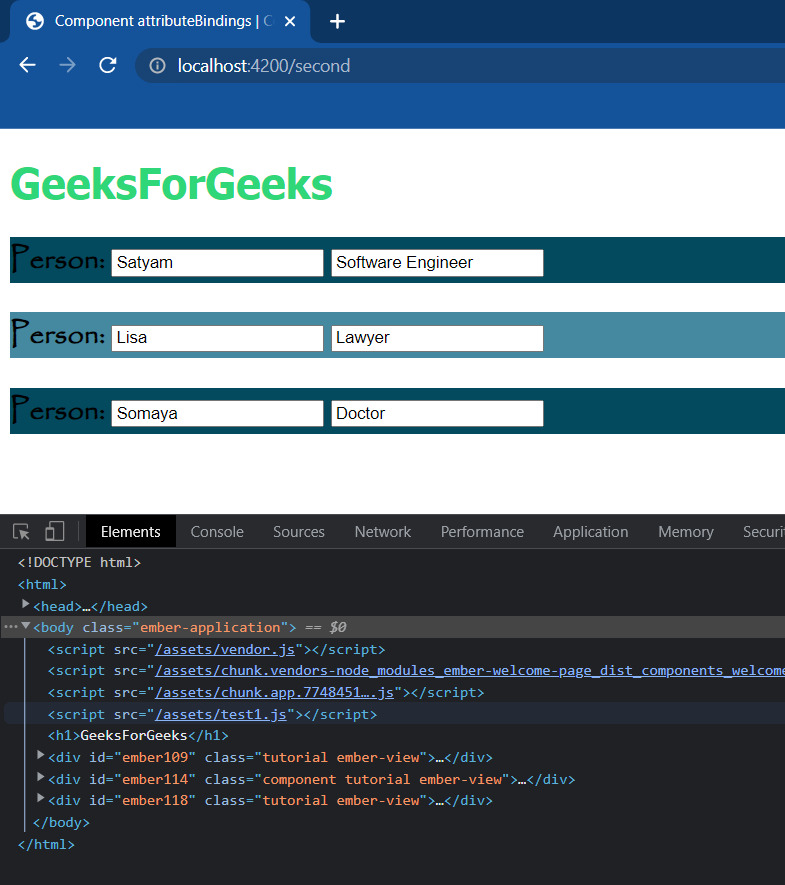
输出2
相关用法
- Embeer.js Component classNames用法及代码示例
- Embeer.js Component cacheFor()用法及代码示例
- Embeer.js Component actions用法及代码示例
- Embeer.js Component getProperties()用法及代码示例
- Embeer.js Component toString()用法及代码示例
- Embeer.js Component decrementProperty()用法及代码示例
- Embeer.js Component incrementProperty()用法及代码示例
- Embeer.js Component elementId用法及代码示例
- Embeer.js Component tagName用法及代码示例
- Embeer.js Component attributeBindings用法及代码示例
- Embeer.js Component set()用法及代码示例
- Embeer.js Component get()用法及代码示例
- Embeer.js ComputedProperty readOnly()用法及代码示例
- Embeer.js Controller toString()用法及代码示例
- Embeer.js Controller decrementProperty()用法及代码示例
- Embeer.js Controller incrementProperty()用法及代码示例
- Embeer.js CoreObject toString()用法及代码示例
- Embeer.js Controller getProperties()用法及代码示例
- Embeer.js Controller addObserver()用法及代码示例
- Embeer.js Controller get()用法及代码示例
- Embeer.js Controller set()用法及代码示例
- Embeer.js Controller init()用法及代码示例
- Embeer.js Promise then()用法及代码示例
- Embeer.js RouterService replaceWith()用法及代码示例
- Embeer.js Transition then()用法及代码示例
注:本文由纯净天空筛选整理自satyam00so大神的英文原创作品 Ember.js Component classNameBindings Property。非经特殊声明,原始代码版权归原作者所有,本译文未经允许或授权,请勿转载或复制。