image-rendering屬性用於設置用於圖像縮放的算法類型。當用戶將圖像縮放到原始尺寸以上或以下時,可以使用此屬性來修改縮放行為。
用法:
shape-rendering:auto | crisp-edges | pixelated | initial | inherit
屬性值:
- auto:它用於指示縮放算法將取決於用戶代理。不同的瀏覽器可能具有不同的算法。
例:
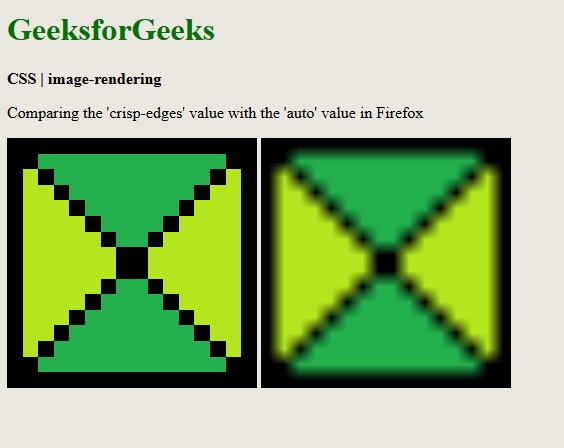
<!DOCTYPE html> <html> <head> <title> CSS | image-rendering </title> <style> .image-crisp { /* Using the crisp-edges value for demonstration */ image-rendering:crisp-edges; } .image-auto { image-rendering:auto; } </style> </head> <body> <h1 style="color:green"> GeeksforGeeks </h1> <b> CSS | image-rendering </b> <p> Comparing the 'crisp-edges' value with the 'auto' value in Firefox </p> <div class="container"> <img class="image-crisp" src= "https://media.geeksforgeeks.org/wp-content/uploads/20191202010422/eg-image.png" width="250px"> <img class="image-auto" src= "https://media.geeksforgeeks.org/wp-content/uploads/20191202010422/eg-image.png" width="250px"> </div> </body> </html>輸出:將crisp-edges值與自動值進行比較

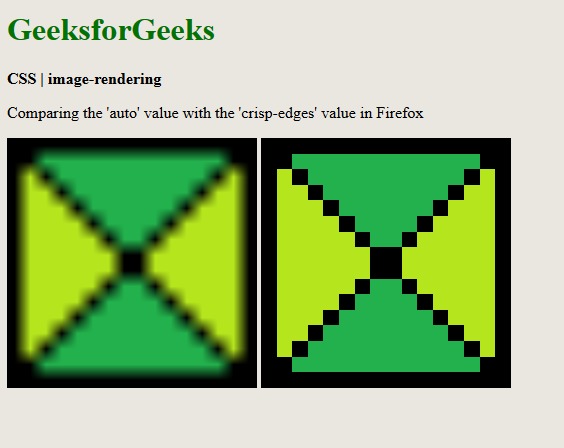
- crisp-edges:它用於指示算法將保留圖像中的對比度和邊。由於使用anti-aliasing,它不會使顏色變平滑或使圖像模糊。此處使用的一些算法是nearest-neighbor和其他非平滑縮放算法。
例:
<!DOCTYPE html> <html> <head> <title> CSS | image-rendering </title> <style> .image-auto { image-rendering:auto; } .image-crisp { image-rendering:crisp-edges; } </style> </head> <body> <h1 style="color:green"> GeeksforGeeks </h1> <b> CSS | image-rendering </b> <p> Comparing the 'auto' value with the 'crisp-edges' value in Firefox </p> <div class="container"> <img class="image-auto" src= "https://media.geeksforgeeks.org/wp-content/uploads/20191202010422/eg-image.png" width="250px"> <img class="image-crisp" src= "https://media.geeksforgeeks.org/wp-content/uploads/20191202010422/eg-image.png" width="250px"> </div> </body> </html>輸出:將自動值與crisp-edges值進行比較

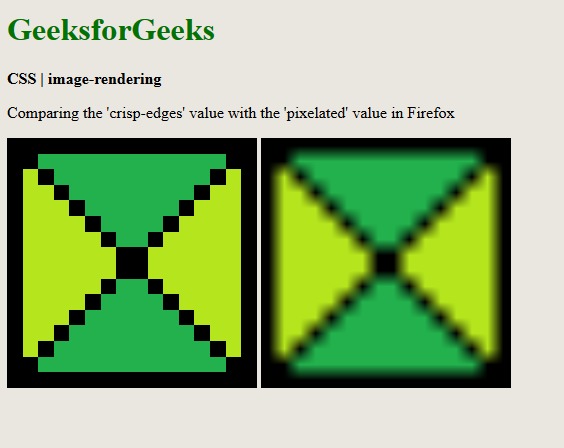
- pixelated:它用於指示按比例放大圖像時使用nearest-neighbor算法。當圖像按比例縮小時,其行為與自動值相同。
例:
<!DOCTYPE html> <html> <head> <title> CSS | image-rendering </title> <style> .image-crisp { /* Using the crisp-edges value for demonstration */ image-rendering:crisp-edges; } .image-pixelated { image-rendering:pixelated; } </style> </head> <body> <h1 style="color:green"> GeeksforGeeks </h1> <b> CSS | image-rendering </b> <p> Comparing the 'crisp-edges' value with the 'pixelated' value in Firefox </p> <div class="container"> <img class="image-crisp" src= "https://media.geeksforgeeks.org/wp-content/uploads/20191202010422/eg-image.png" width="250px"> <img class="image-pixelated" src= "https://media.geeksforgeeks.org/wp-content/uploads/20191202010422/eg-image.png" width="250px"> </div> </body> </html>輸出:比較crisp-edges值和像素化值

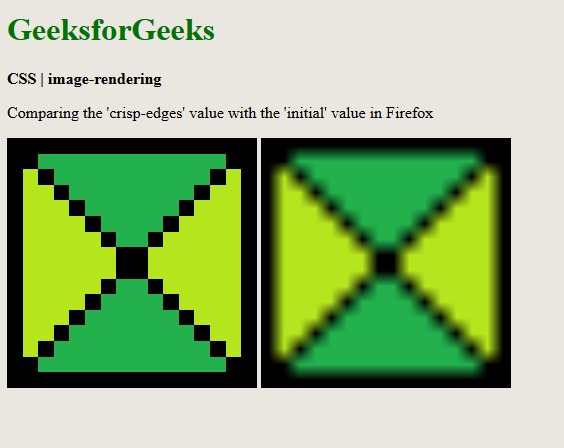
- initial:用於將屬性設置為其默認值。
Example:<!DOCTYPE html> <html> <head> <title> CSS | image-rendering </title> <style> .image-crisp { /* Using the crisp-edges value for demonstration */ image-rendering:crisp-edges; } .image-auto { image-rendering:initial; } </style> </head> <body> <h1 style="color:green"> GeeksforGeeks </h1> <b> CSS | image-rendering </b> <p> Comparing the 'crisp-edges' value with the 'initial' value in Firefox </p> <div class="container"> <img class="image-crisp" src= "https://media.geeksforgeeks.org/wp-content/uploads/20191202010422/eg-image.png" width="250px"> <img class="image-auto" src= "https://media.geeksforgeeks.org/wp-content/uploads/20191202010422/eg-image.png" width="250px"> </div> </body> </html>輸出:將crisp-edges值與初始值進行比較

- inherit:它用於將屬性設置為從其父元素繼承。
支持的瀏覽器:image-rendering屬性支持的瀏覽器如下所示:
- chrome
- 火狐瀏覽器
- 蘋果瀏覽器
- Opera
相關用法
- CSS transition-property用法及代碼示例
- CSS nav-up用法及代碼示例
- CSS right屬性用法及代碼示例
- CSS nav-down用法及代碼示例
- CSS nav-right用法及代碼示例
- CSS all屬性用法及代碼示例
- CSS top屬性用法及代碼示例
- HTML li value用法及代碼示例
- CSS transform屬性用法及代碼示例
- CSS overflow-y屬性用法及代碼示例
- CSS transition屬性用法及代碼示例
- HTML DOM id用法及代碼示例
- CSS perspective屬性用法及代碼示例
- CSS clip屬性用法及代碼示例
- CSS fill屬性用法及代碼示例
注:本文由純淨天空篩選整理自sayantanm19大神的英文原創作品 CSS | image-rendering Property。非經特殊聲明,原始代碼版權歸原作者所有,本譯文未經允許或授權,請勿轉載或複製。
