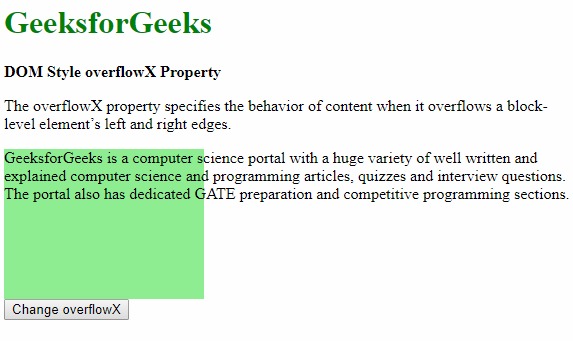
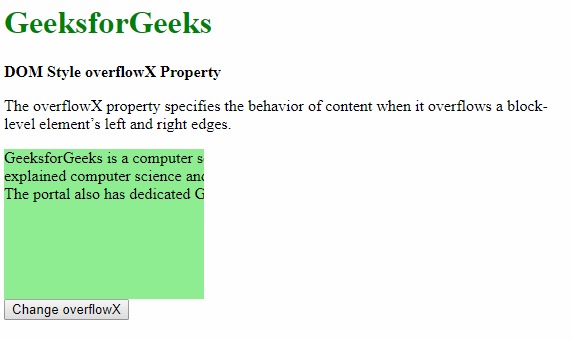
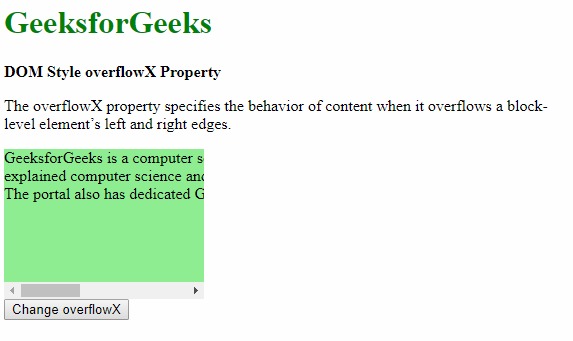
HTML DOM中的Style溢出X屬性用於指定內容在元素的左右邊溢出時的行為。根據該值,內容可以隱藏,顯示或滾動條。
用法:
- 它返回overflowX屬性。
object.style.overflowX
- 它用於設置overflowX屬性。
object.style.overflowX = "hidden|visible|scroll|auto|initial|
inherit"
屬性值:
- hidden:內容被裁剪並隱藏以適合元素。使用此值時,不提供滾動條。
Example:<!DOCTYPE html> <html> <head> <title> DOM Style overflowX Property </title> <style> .content { background-color:lightgreen; height:150px; width:200px; white-space:nowrap; } </style> </head> <body> <h1 style="color:green"> GeeksforGeeks </h1> <b>DOM Style overflowX Property</b> <p> The overflowX property specifies the behavior of content when it overflows a block-level element’s left and right edges. </p> <div class="content"> GeeksforGeeks is a computer science portal with a huge variety of well written and<br> explained computer science and programming articles, quizzes and interview questions. <br>The portal also has dedicated GATE preparation and competitive programming sections. </div> <button onclick="setOverflow()"> Change overflowX </button> <!-- Script to set overflowX to hidden --> <script> function setOverflow() { elem = document.querySelector('.content'); elem.style.overflowX = 'hidden'; } </script> </body> </html>輸出:
- 在單擊按鈕之前:

- 單擊按鈕後:

- 在單擊按鈕之前:
- visible:內容沒有被裁剪,並且可能溢出到包含元素的左側或右側。
Example:<!DOCTYPE html> <html> <head> <title> DOM Style overflowX Property </title> <style> .content { background-color:lightgreen; height:150px; width:200px; white-space:nowrap; overflow-x:hidden; } </style> </head> <body> <h1 style="color:green"> GeeksforGeeks </h1> <b>DOM Style overflowX Property</b> <p> The overflowX property specifies the behavior of content when it overflows a block-level element’s left and right edges. </p> <div class="content"> GeeksforGeeks is a computer science portal with a huge variety of well written and<br> explained computer science and programming articles, quizzes and interview questions. <br>The portal also has dedicated GATE preparation and competitive programming sections. </div> <button onclick="setOverflow()"> Change overflowX </button> <!-- Script to set overflowX to visible --> <script> function setOverflow() { elem = document.querySelector('.content'); elem.style.overflowX = 'visible'; } </script> </body> </html>輸出:
- 在單擊按鈕之前:

- 單擊按鈕後:

- 在單擊按鈕之前:
- scroll:內容被裁剪以適合元素框,並提供滾動條以幫助滾動多餘的內容。即使未剪切內容,也會在此處添加滾動條。
Example:<!DOCTYPE html> <html> <head> <title> DOM Style overflowX Property </title> <style> .content { background-color:lightgreen; height:150px; width:200px; white-space:nowrap; } </style> </head> <body> <h1 style="color:green"> GeeksforGeeks </h1> <b>DOM Style overflowX Property</b> <p> The overflowX property specifies the behavior of content when it overflows a block-level element’s left and right edges. </p> <div class="content"> GeeksforGeeks is a computer science portal with a huge variety of well written and<br> explained computer science and programming articles, quizzes and interview questions. <br>The portal also has dedicated GATE preparation and competitive programming sections. </div> <button onclick="setOverflow()"> Change overflowX </button> <!-- Script to set overflowX to scroll --> <script> function setOverflow() { elem = document.querySelector('.content'); elem.style.overflowX = 'scroll'; } </script> </body> </html>輸出:
- 在單擊按鈕之前:

- 單擊按鈕後:

- 在單擊按鈕之前:
- auto:auto的行為取決於內容,僅在內容溢出時才添加滾動條。
Example:<!DOCTYPE html> <html> <head> <title> DOM Style overflowX Property </title> <style> .content { background-color:lightgreen; height:150px; width:200px; white-space:nowrap; } </style> </head> <body> <h1 style="color:green"> GeeksforGeeks </h1> <b>DOM Style overflowX Property</b> <p> The overflowX property specifies the behavior of content when it overflows a block-level element’s left and right edges. </p> <div class="content"> GeeksforGeeks is a computer science portal with a huge variety of well written and<br> explained computer science and programming articles, quizzes and interview questions. <br>The portal also has dedicated GATE preparation and competitive programming sections. </div> <button onclick="setOverflow()"> Change overflowX </button> <!-- Script to set overflowX to auto --> <script> function setOverflow() { elem = document.querySelector('.content'); elem.style.overflowX = 'auto'; } </script> </body> </html>輸出:
- 在單擊按鈕之前:

- 單擊按鈕後:

- 在單擊按鈕之前:
- initial:這用於將此屬性設置為其默認值。
Example:<!DOCTYPE html> <html> <head> <title> DOM Style overflowX Property </title> <style> .content { background-color:lightgreen; height:150px; width:200px; white-space:nowrap; /* Setting the overflow-x property to 'scroll' to observe the effect of initial */ overflow-x:scroll; } </style> </head> <body> <h1 style="color:green"> GeeksforGeeks </h1> <b>DOM Style overflowX Property</b> <p> The overflowX property specifies the behavior of content when it overflows a block-level element’s left and right edges. </p> <div class="content"> GeeksforGeeks is a computer science portal with a huge variety of well written and<br> explained computer science and programming articles, quizzes and interview questions. <br>The portal also has dedicated GATE preparation and competitive programming sections. </div> <button onclick="setOverflow()"> Change overflowX </button> <!-- Script to set overflowX to initial --> <script> function setOverflow() { elem = document.querySelector('.content'); elem.style.overflowX = 'initial'; } </script> </body> </html>輸出:
- 在單擊按鈕之前:

- 單擊按鈕後:

- 在單擊按鈕之前:
- inherit:它從其父元素繼承屬性。
Example:<!DOCTYPE html> <html> <head> <title> DOM Style overflowX Property </title> <style> #parent { /* Setting the overflow-x property of the parent */ overflow-x:hidden; } .content { background-color:lightgreen; height:150px; width:200px; white-space:nowrap; } </style> </head> <body> <h1 style="color:green"> GeeksforGeeks </h1> <b>DOM Style overflowX Property</b> <p> The overflowX property specifies the behavior of content when it overflows a block-level element’s left and right edges. </p> <div id="parent"> <div class="content"> GeeksforGeeks is a computer science portal with a huge variety of well written and <br> explained computer science and programming articles, quizzes and interview questions. <br>The portal also has dedicated GATE preparation and competitive programming sections. </div> </div> <button onclick="setOverflow()"> Change overflowX </button> <!-- Script to use overflowX to inherit --> <script> function setOverflow() { elem = document.querySelector('.content'); elem.style.overflowX = 'inherit'; } </script> </body> </html>輸出:
- 在單擊按鈕之前:

- 單擊按鈕後:

支持的瀏覽器:下麵列出了DOM Style溢出X屬性支持的瀏覽器:
- 穀歌瀏覽器
- IE瀏覽器
- Firefox
- Opera
- 蘋果Safari
- 在單擊按鈕之前:
相關用法
- HTML Style top用法及代碼示例
- HTML Style right用法及代碼示例
- HTML Style wordSpacing用法及代碼示例
- HTML Style borderLeft用法及代碼示例
- HTML Style borderRight用法及代碼示例
- HTML Style textAlign用法及代碼示例
- HTML Style opacity用法及代碼示例
- HTML Style height用法及代碼示例
- HTML Style textDecorationLine用法及代碼示例
- HTML Style whiteSpace用法及代碼示例
- HTML Style columnRuleStyle用法及代碼示例
- HTML Style display用法及代碼示例
- HTML Style transformStyle用法及代碼示例
- HTML Style visibility用法及代碼示例
- HTML Style animationDirection用法及代碼示例
注:本文由純淨天空篩選整理自sayantanm19大神的英文原創作品 HTML | DOM Style overflowX Property。非經特殊聲明,原始代碼版權歸原作者所有,本譯文未經允許或授權,請勿轉載或複製。
