jQuery UI包含GUI小部件,視覺效果和使用jQuery,CSS和HTML實現的主題。 jQuery UI非常適合建造網頁的UI接口。jQuery UI工具提示小部件可幫助我們添加新主題並允許自定義。在本文中,我們將看到如何使用跟蹤 jQuery UI工具提示中的選項。的跟蹤選項如果設置為真正,工具提示將跟隨jQuery UI工具提示中的光標。默認情況下,值為假。
用法:
$(".selector").tooltips(
   { track:true }
);
參數:
- Boolean:如果設置為false,則工具提示將不會跟隨光標。
CDN鏈接:首先,添加項目所需的jQuery UI腳本。
<link href=”https://code.jquery.com/ui/1.10.4/themes/ui-lightness/jquery-ui.css” rel = “stylesheet”>
<script src=”https://code.jquery.com/jquery-1.10.2.js”></script>
<script src=”https://code.jquery.com/ui/1.10.4/jquery-ui.js”></script>
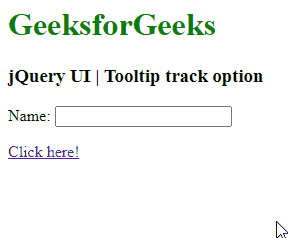
範例1:在以下示例中,track選項設置為false。請參閱輸出圖像以了解。
HTML
<!DOCTYPE html>
<html lang="en">
  <head>
    <meta charset="utf-8" />
    <link
      href=
"https://code.jquery.com/ui/1.10.4/themes/ui-lightness/jquery-ui.css"
      rel="stylesheet"
    />
    <script src=
"https://code.jquery.com/jquery-1.10.2.js">
    </script>
    <script src=
"https://code.jquery.com/ui/1.10.4/jquery-ui.js">
    </script>

    <h1 style="color:green">GeeksforGeeks</h1>
    <h3>jQuery UI | Tooltip track option</h3>

    <script>
      $(function () {
        $("#gfg1").tooltip({
          track:false,
        });
        $("#gfg1").tooltip();
        $("#gfg2").tooltip();
      });
    </script>
  </head>

  <body>
    <label for="name">Name:</label>
    <input id="gfg1" title="GeeksforGeeks" />

    <p><a id="gfg2" href="" title="GeeksforGeeks"> Click here!</a></p>
  </body>
</html>
輸出:
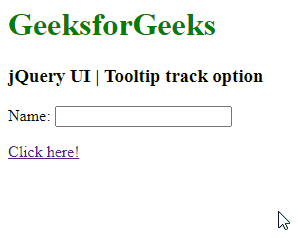
範例2:在以下示例中,track選項設置為true。請參閱輸出圖像以更好地理解。
HTML
<!DOCTYPE html>
<html lang="en">
  <head>
    <meta charset="utf-8" />
    <link
      href=
"https://code.jquery.com/ui/1.10.4/themes/ui-lightness/jquery-ui.css"
      rel="stylesheet"
    />
    <script src=
"https://code.jquery.com/jquery-1.10.2.js">
    </script>
    <script src=
"https://code.jquery.com/ui/1.10.4/jquery-ui.js">
    </script>

    <h1 style="color:green">GeeksforGeeks</h1>
    <h3>jQuery UI | Tooltip track option</h3>

    <script>
      $(function () {
        $("#gfg1").tooltip({
          track:true,
        });
        $("#gfg1").tooltip();
        $("#gfg2").tooltip();
      });
    </script>
  </head>

  <body>
    <label for="name">Name:</label>
    <input id="gfg1" title="GeeksforGeeks" />

    <p><a id="gfg2" href="" title="GeeksforGeeks"> Click here!</a></p>
  </body>
</html>
輸出:
相關用法
- jQuery UI Tooltips disabled用法及代碼示例
- jQuery UI Tooltips option()用法及代碼示例
- jQuery UI Tooltips show用法及代碼示例
- jQuery UI Tooltips hide用法及代碼示例
- jQuery UI Tooltips content用法及代碼示例
- jQuery UI Tooltips open()用法及代碼示例
- jQuery UI Tooltips close()用法及代碼示例
- jQuery UI Tooltips enable()用法及代碼示例
- jQuery UI Tooltips disable()用法及代碼示例
- jQuery UI Tooltips destroy()用法及代碼示例
- jQuery UI Tooltips open用法及代碼示例
- jQuery UI Tooltips close用法及代碼示例
- jQuery UI Tooltips create用法及代碼示例
- HTML DOM Track用法及代碼示例
- HTML Track kind用法及代碼示例
- HTML Track default用法及代碼示例
- HTML Track src用法及代碼示例
- HTML Track srclang用法及代碼示例
- HTML Track label用法及代碼示例
- HTML <track> srclang屬性用法及代碼示例
- HTML <track> label屬性用法及代碼示例
- HTML <track> default屬性用法及代碼示例
注:本文由純淨天空篩選整理自taran910大神的英文原創作品 jQuery UI Tooltips track Option。非經特殊聲明,原始代碼版權歸原作者所有,本譯文未經允許或授權,請勿轉載或複製。