PIL是Python Imaging Library,它为python解释器提供了图像编辑函数。的ImageDraw模块为Image对象提供简单的2D图形。您可以使用该模块来创建新图像,注释或修饰现有图像,以及即时生成图形以供Web使用。
ImageDraw.Draw.polygon()绘制多边形。
多边形轮廓由给定坐标之间的直线以及最后一个坐标与第一个坐标之间的直线组成。
用法: PIL.ImageDraw.Draw.polygon(xy, fill=None, outline=None)
参数:
参数:
xy –由[[x,y),(x,y),…]等2元组或[x,y,x,y,…]等数值组成的序列。
轮廓–轮廓使用的颜色。
fill –用于填充的颜色。
返回值:Image对象。
import math
from PIL import Image, ImageDraw
from PIL import ImagePath

side = 8
xy = [
    ((math.cos(th) + 1) * 90,
     (math.sin(th) + 1) * 60)
    for th in [i * (2 * math.pi) / side for i in range(side)]
    ]

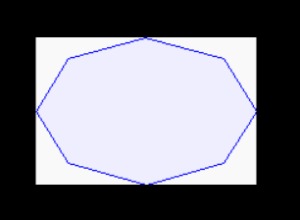
image = ImagePath.Path(xy).getbbox()
size = list(map(int, map(math.ceil, image[2:])))

img = Image.new("RGB", size, "# f9f9f9")
img1 = ImageDraw.Draw(img)
img1.polygon(xy, fill ="# eeeeff", outline ="blue")

img.show()
输出:

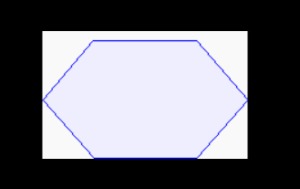
另一个例子:采用不同的参数。
import math
from PIL import Image, ImageDraw
from PIL import ImagePath

side = 6
xy = [
    ((math.cos(th) + 1) * 90,
     (math.sin(th) + 1) * 60)
    for th in [i * (2 * math.pi) / side for i in range(side)]
    ]

image = ImagePath.Path(xy).getbbox()
size = list(map(int, map(math.ceil, image[2:])))

img = Image.new("RGB", size, "# f9f9f9")
img1 = ImageDraw.Draw(img)
img1.polygon(xy, fill ="# eeeeff", outline ="blue")

img.show()
输出:

相关用法
- Python os.dup()用法及代码示例
- Python next()用法及代码示例
- Python set()用法及代码示例
- Python hasattr()用法及代码示例
- Python PIL putdata()用法及代码示例
- Python PIL getcolors()用法及代码示例
- Python PIL tobytes()用法及代码示例
- Python PIL getpalette()用法及代码示例
- Python os.get_blocking()用法及代码示例
- Python Tensorflow cos()用法及代码示例
- Python sympy.crt()用法及代码示例
- Python sympy.nT()用法及代码示例
- Python PIL putalpha()用法及代码示例
注:本文由纯净天空筛选整理自Sunitamamgai大神的英文原创作品 Python PIL | ImageDraw.Draw.polygon() Method。非经特殊声明,原始代码版权归原作者所有,本译文未经允许或授权,请勿转载或复制。
