PIL是Python Imaging Library,它為python解釋器提供了圖像編輯函數。的ImageDraw模塊為Image對象提供簡單的2D圖形。您可以使用該模塊來創建新圖像,注釋或修飾現有圖像,以及即時生成圖形以供Web使用。
ImageDraw.Draw.polygon()繪製多邊形。
多邊形輪廓由給定坐標之間的直線以及最後一個坐標與第一個坐標之間的直線組成。
用法: PIL.ImageDraw.Draw.polygon(xy, fill=None, outline=None)
參數:
參數:
xy –由[[x,y),(x,y),…]等2元組或[x,y,x,y,…]等數值組成的序列。
輪廓–輪廓使用的顏色。
fill –用於填充的顏色。
返回值:Image對象。
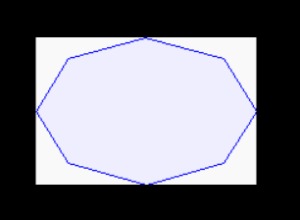
import math
from PIL import Image, ImageDraw
from PIL import ImagePath

side = 8
xy = [
    ((math.cos(th) + 1) * 90,
     (math.sin(th) + 1) * 60)
    for th in [i * (2 * math.pi) / side for i in range(side)]
    ]

image = ImagePath.Path(xy).getbbox()
size = list(map(int, map(math.ceil, image[2:])))

img = Image.new("RGB", size, "# f9f9f9")
img1 = ImageDraw.Draw(img)
img1.polygon(xy, fill ="# eeeeff", outline ="blue")

img.show()
輸出:

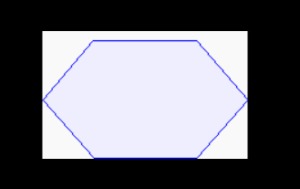
另一個例子:采用不同的參數。
import math
from PIL import Image, ImageDraw
from PIL import ImagePath

side = 6
xy = [
    ((math.cos(th) + 1) * 90,
     (math.sin(th) + 1) * 60)
    for th in [i * (2 * math.pi) / side for i in range(side)]
    ]

image = ImagePath.Path(xy).getbbox()
size = list(map(int, map(math.ceil, image[2:])))

img = Image.new("RGB", size, "# f9f9f9")
img1 = ImageDraw.Draw(img)
img1.polygon(xy, fill ="# eeeeff", outline ="blue")

img.show()
輸出:

相關用法
- Python os.dup()用法及代碼示例
- Python next()用法及代碼示例
- Python set()用法及代碼示例
- Python hasattr()用法及代碼示例
- Python PIL putdata()用法及代碼示例
- Python PIL getcolors()用法及代碼示例
- Python PIL tobytes()用法及代碼示例
- Python PIL getpalette()用法及代碼示例
- Python os.get_blocking()用法及代碼示例
- Python Tensorflow cos()用法及代碼示例
- Python sympy.crt()用法及代碼示例
- Python sympy.nT()用法及代碼示例
- Python PIL putalpha()用法及代碼示例
注:本文由純淨天空篩選整理自Sunitamamgai大神的英文原創作品 Python PIL | ImageDraw.Draw.polygon() Method。非經特殊聲明,原始代碼版權歸原作者所有,本譯文未經允許或授權,請勿轉載或複製。
